
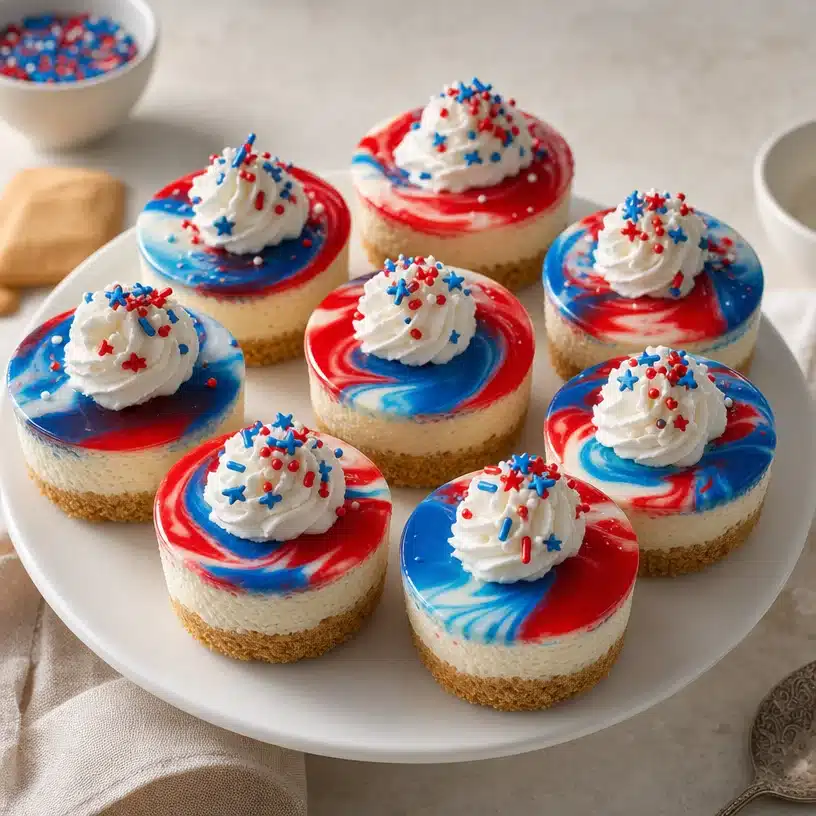
Are you envisioning a dessert that not only delights the taste buds but also captures the festive spirit? Look no further than these stunning Red, White and Blue Mini Cheesecakes! Perfect for any patriotic gathering or summer BBQ, these mini cheesecakes are a fun and easy way to impress your friends and family. Made with creamy layers of cheesecake and vibrant colors, they are as delicious as they are beautiful. Ready to dive into this culinary adventure? Let’s get started!
Why You’ll Love This Red, White and Blue Mini Cheesecakes
There are countless reasons to love these delightful mini cheesecakes. First and foremost, they are incredibly easy to make! With simple ingredients and straightforward steps, you can whip them up in no time. The combination of cream cheese, sour cream, and vanilla creates a rich and velvety filling that’s hard to resist.
But what truly sets this recipe apart is its festive presentation. Each mini cheesecake is layered with colors that evoke the spirit of summer gatherings, Fourth of July celebrations, or any time you want to show off a little patriotism. Moreover, they are the perfect portion size, allowing everyone to indulge without feeling guilty.
Not to mention, these cheesecakes are customizable! You can adjust the colors or even flavors to suit your personal preferences, making them versatile for any occasion. So, gather your ingredients, and let’s jump right into how to make these delightful treats!
Step-by-Step: Making Red, White and Blue Mini Cheesecakes
Ingredients
- 1 cup (134g) vanilla wafer cookie crumbs
- 2 tbsp (26g) sugar
- 4 tbsp (56g) butter, melted
- 12 ounces (339g) cream cheese, room temperature
- 1/2 cup (104g) sugar
- 3 tbsp (24g) flour
- 1/2 cup (115g) sour cream
- 1 1/2 tsp vanilla extract
- 2 eggs
- Blue gel icing color
- Red gel icing color
- 1/2 cup (120ml) heavy whipping cream, cold
- 5 tbsp (36g) powdered sugar
- 1/2 tsp vanilla extract
- Sprinkles
Directions
- Preheat your oven to 325°F (162°C). Add cupcake liners to a cupcake pan.
- In a bowl, combine the vanilla wafer cookie crumbs, 2 tbsp sugar, and melted butter. Divide this mixture between the cupcake liners, pressing it into the bottoms firmly, about 2 tablespoons per cup.
- Bake the crusts for about 5 minutes, then remove from the oven and allow them to cool while you prepare the filling.
- Lower the oven temperature to 300°F (148°C). In a large bowl, mix the cream cheese, 1/2 cup sugar, and flour until combined. Be sure to use low speed to minimize air in the batter, which can cause cracks.
- Scrape down the sides of the bowl and add the sour cream and 1 1/2 tsp vanilla extract. Beat on low speed until well combined.
- Add the eggs one at a time, beating slowly and scraping the sides of the bowl after each addition.
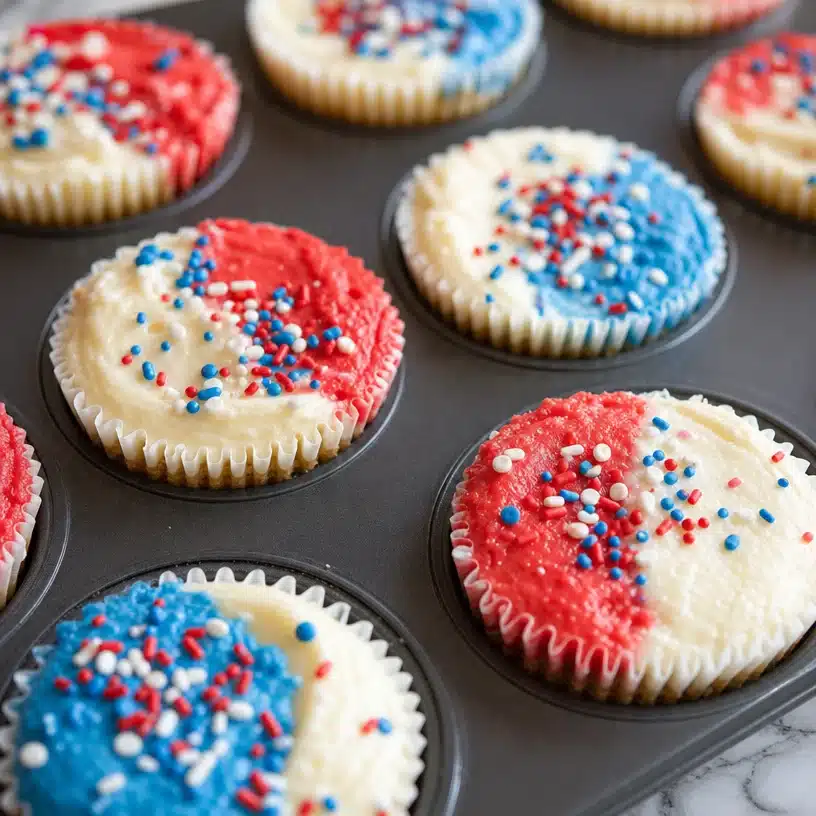
- Divide the batter into three bowls. Leave one plain, color one with red gel icing color, and the other with blue gel icing color.
- Layer the colored batter into the cooled crusts, starting with a tablespoon of the white batter, followed by a tablespoon of red, and then blue. Fill the cups until almost full.
- Bake the cheesecakes for 18 to 20 minutes, then turn off the oven and leave the door closed for another 10 minutes to help them set properly.
- Crack the oven door open and allow the cheesecakes to cool for 15 to 20 minutes. Then, transfer them to the fridge to finish cooling.
- Once cooled, carefully remove the mini cheesecakes from the pan.
- For the whipped cream topping, combine the heavy whipping cream, powdered sugar, and 1/2 tsp vanilla extract in a large mixing bowl. Whip on high speed until stiff peaks form.
- Pipe the whipped cream on top of the cooled mini cheesecakes and finish with sprinkles.
- Refrigerate the cheesecakes in an airtight container until ready to serve. These treats are best enjoyed within 2 to 3 days.
Best Ways to Serve Red, White and Blue Mini Cheesecakes
When it comes to serving these mini cheesecakes, presentation is key! Arrange them on a festive platter, or use colorful cupcake liners to enhance their visual appeal. They make for delightful treats at summer picnics, birthday parties, or any celebration where you want to spread joy.
To elevate the experience, consider serving these cheesecakes alongside fresh berries like strawberries, blueberries, or raspberries. A drizzle of fruit sauce or a scoop of vanilla ice cream can also take them to the next level. Not only does this enhance the flavor, but it also adds an extra layer of fun when you’re serving guests.
Storage Tips for Red, White and Blue Mini Cheesecakes
To keep your mini cheesecakes fresh, store them in an airtight container in the refrigerator. They are best enjoyed within 2 to 3 days of making them, as the whipped cream topping may lose its texture over time. If you want to prepare in advance, you can make the cheesecakes without the whipped cream topping and add it just before serving.
For longer storage, consider freezing the cheesecakes. Place them in a freezer-safe container, making sure to protect them from freezer burn. When you’re ready to enjoy, let them thaw in the refrigerator overnight, then top with whipped cream just before serving!
Expert Tips for Perfect Red, White and Blue Mini Cheesecakes
- Room Temperature Ingredients: For the creamiest texture, ensure your cream cheese is at room temperature before mixing. This prevents lumps and helps achieve a smoother filling.
- Avoid Over-Mixing: Be cautious not to over-mix the batter, especially after adding the eggs. This can lead to cracks in your cheesecakes during baking.
- Use Gel Colors: Gel colors provide vibrant hues without altering the battery, making them perfect for the colorful layers in these cheesecakes.
- Pipe with Care: When piping the whipped cream, use a piping bag fitted with a star tip for that professional finish. Don’t be shy with the sprinkles, they make a big difference!
- Chill Properly: Allow your cheesecakes to chill thoroughly before serving. This not only enhances the flavor but also ensures a firm texture.
Delicious Variations of Red, White and Blue Mini Cheesecakes
Feel free to switch things up with these mini cheesecakes! Instead of vanilla wafers, try using crushed graham crackers or chocolate cookies for the crust. You can also mix in flavors, such as adding lemon juice for a zesty twist or using different extracts like almond for a unique taste.
If you want to make them even more patriotic, swap the gel colors for natural alternatives made from beet juice or blue spirulina, depending on what’s available to you. You can even experiment with filling flavors by adding fruit purees to the cheesecake batter!
FAQs
Can I make these cheesecakes ahead of time?
Absolutely! You can prepare the cheesecakes up to two days in advance. Just wait to add the whipped cream topping until just before serving for the best texture.
What if I don’t have blue and red gel icing?
If gel colors are not available, you can use food dye. However, gel colors provide a richer and deeper pigmentation, producing more vibrant layers.
How can I make these gluten-free?
You can easily make the crust gluten-free by using gluten-free cookie crumbs! The filling is naturally gluten-free as long as the ingredients you choose are certified gluten-free.
Now you’re all set to create these stunning Red, White and Blue Mini Cheesecakes! With their eye-catching layers and delicious taste, they’re sure to be a hit. So, preheat that oven and enjoy the magic of baking!
Print
Red, White and Blue Mini Cheesecakes
- Total Time: 45 minutes
- Yield: 12 servings 1x
- Diet: Vegetarian
Description
Delight in these festive mini cheesecakes layered with vibrant colors, perfect for summer gatherings and celebrations.
Ingredients
- 1 cup (134g) vanilla wafer cookie crumbs
- 2 tbsp (26g) sugar
- 4 tbsp (56g) butter, melted
- 12 ounces (339g) cream cheese, room temperature
- 1/2 cup (104g) sugar
- 3 tbsp (24g) flour
- 1/2 cup (115g) sour cream
- 1 1/2 tsp vanilla extract
- 2 eggs
- Blue gel icing color
- Red gel icing color
- 1/2 cup (120ml) heavy whipping cream, cold
- 5 tbsp (36g) powdered sugar
- 1/2 tsp vanilla extract
- Sprinkles
Instructions
- Preheat your oven to 325°F (162°C). Add cupcake liners to a cupcake pan.
- Combine the vanilla wafer cookie crumbs, 2 tbsp sugar, and melted butter in a bowl.
- Divide this mixture between the cupcake liners, pressing it into the bottoms firmly, about 2 tablespoons per cup.
- Bake the crusts for about 5 minutes, then remove from the oven and allow them to cool.
- Lower the oven temperature to 300°F (148°C).
- Mix the cream cheese, 1/2 cup sugar, and flour until combined.
- Add the sour cream and 1 1/2 tsp vanilla extract, beating on low speed until well combined.
- Add the eggs one at a time, beating slowly and scraping the sides of the bowl after each addition.
- Divide the batter into three bowls. Color one with red gel icing and the other with blue gel icing.
- Layer the colored batter into the cooled crusts, starting with a tablespoon of the white batter, followed by a tablespoon of red, and then blue.
- Bake the cheesecakes for 18 to 20 minutes, then turn off the oven and leave the door closed for another 10 minutes.
- Crack the oven door open and allow the cheesecakes to cool for 15 to 20 minutes.
- Transfer them to the fridge to finish cooling.
- Combine the heavy whipping cream, powdered sugar, and 1/2 tsp vanilla extract in a large mixing bowl for the topping.
- Pipe the whipped cream on top of the cooled mini cheesecakes and finish with sprinkles.
- Refrigerate the cheesecakes until ready to serve.
Notes
For best results, use room temperature ingredients and avoid over-mixing to prevent cracks in the cheesecake.
- Prep Time: 20 minutes
- Cook Time: 25 minutes
- Category: Dessert
- Method: Baking
- Cuisine: American
Nutrition
- Serving Size: 1 cheesecake
- Calories: 250
- Sugar: 10g
- Sodium: 200mg
- Fat: 15g
- Saturated Fat: 8g
- Unsaturated Fat: 4g
- Trans Fat: 0g
- Carbohydrates: 28g
- Fiber: 1g
- Protein: 4g
- Cholesterol: 60mg